GSoC 2022: Progress Report 1
Hello everyone. In this post, I will explain the current state of std implementation for UEFI. The rust repository containing my work can be found here. In the end, we will use this fork to run a Rust binary.
Status Report
What Works Well
Allocation
All the heap-allocated types, such as String, Vec, etc., can now be used in UEFI. While there needs to be more testing, I haven’t encountered any issues this far.
Rust main
A new UEFI rust application can now use the normal Rust main() function instead of a custom efi_main entry-point. This means a Rust binary crate generated by cargo should run without needing any special modification.
Access to SystemTable and SystemHandle
Any UEFI application/crate can now access the SystemTable and SystemHandle that are passed to the application by UEFI using the functions provided under std::os::uefi::env.
Mutex and RwLock
I am using the implementation provided under sys::unsupported. This implementation works using Cell type. This implementation should besically work in any platform having only a single thread. Still does need testing.
Cmath
It is provided by Rust compiler_builtins, so it should work without any issues.
What Partially Works
Stdio
StdOut is implemented to use UEFI ConOut, and StdErr is implemented to use UEFI StdErr. This means using standard Rust printing (println!, eprintln!, etc.) is now possible.
The StandardInput is broken since the “Enter” key behaves quite differently in UEFI than in the typical Rust targets. However, it is possible to read a fixed stream of bytes from ConIn.
Stable std
Rust std for UEFI can now be built using the x.py script like all other Rust std targets. Using the restricted_std feature for UEFI is no longer required.
Future Goals
Implement os_str module
This module bridges the gap between Rust and platform-native strings by simultaneously representing Rust and platform-native string values. In particular, it allows a Rust string to be converted into an “OS” string at no cost.
Note: OsString and OsStr internally do not necessarily hold strings in the form native to the platform.
I am currently considering using the windows implementation of os_str with some additional methods.
Implement path
This module has no default implementation, so we need to implement it. It just defines path separator and stuff, so it is pretty trivial.
Run a simple Rust binary in UEFI
This is a simple walkthrough for anyone who wants to try out Rust std in UEFI. As you will see, it is pretty painless now. If you don’t already have rustup installed, I suggest taking a look at official docs or my previous post.
Clone Source
We will clone the Rust source from my fork:
Then we need to checkout the uefi-std-next branch:
Build Toolchain
First, set up the config.toml file using the ./x.py setup command. The options I am using in my config are the following:
# Includes one of the default files in src/bootstrap/defaults
= "library"
= 2
[]
= "if-available"
#ccache = "/bin/ccache"
= true
# ninja = true
[]
= true
= true
= false
Next, we will build the host toolchain:
Once that succeeds, we will build for the UEFI target:
Now, we will add this toolchain using rustup:
Now we are all set.
Build a UEFI Binary
Create a new project using cargo
This will autogenerate a “Hello World” program for us. Now we will set the project to use our new toolchain:
Now we build the application:
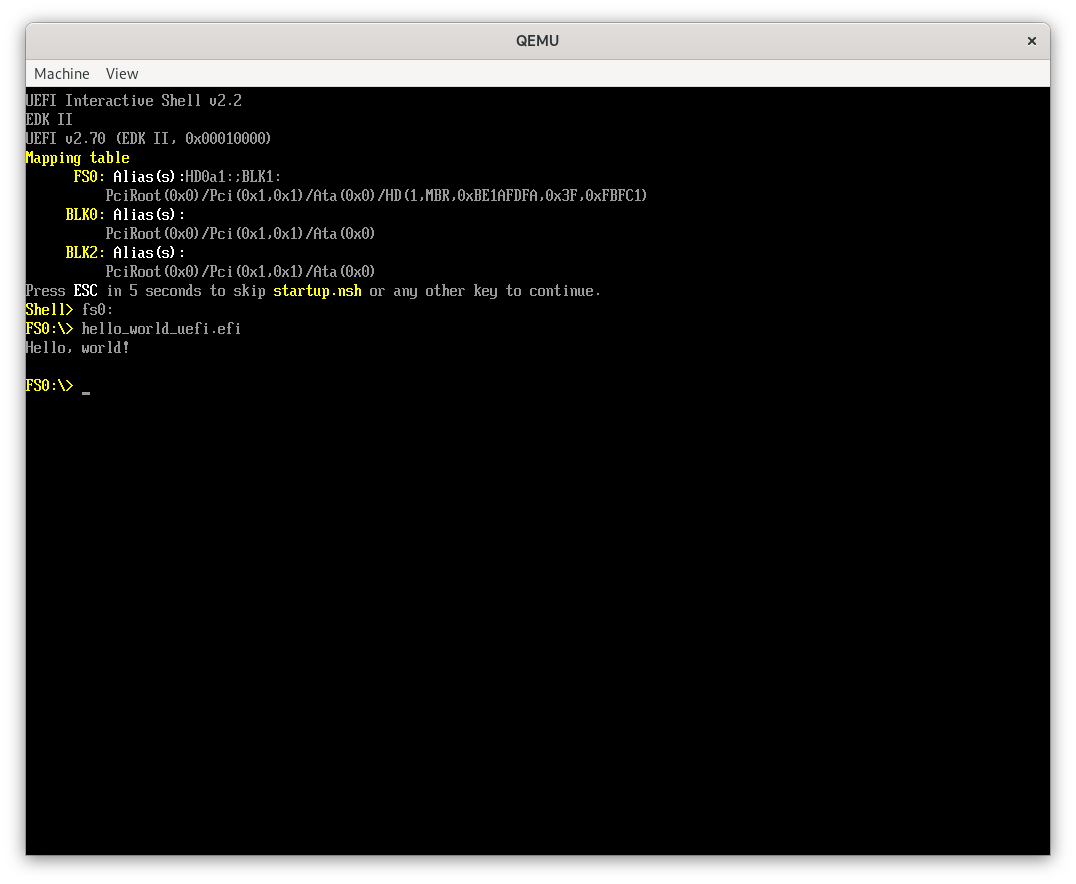
Finally, we run the binary using qemu:
I am mounting the debug folder here, so you must go to the fs0: to run the hello_world_uefi.efi file. but as you can see, it runs without any modification, just like any other Rust target
Screenshot

Conclusion
Now that the toolchain has reached this stage, I no longer need to maintain any special patches for everything to work, so that is great. Also, it is now possible to run tests (althouth they fail, saying ‘Cannot determine OS from triple’). Anyone interested in this project can try it out and open issues/PRs if they find anything.
Consider supporting me if you like my work.